Rain Barrel Assembly, Installation, Maintenance and Warranty
Click Here for Printable VersionASSEMBLY
They are shipped unassembled to ensure the components are not damaged during transport as there is no protective packaging included.
- A filter basket that simply fits into the six inch hole in the lid
- A T-shaped overflow adaptor that slides firmly into the top-side three inch hole
- An overflow hose which slides over the open end of the T-shaped adaptor
- A male to male adaptor (nipple) with tapered thread on one end and straight thread on the other end.
- A spigot which threads onto the straight thread of the male to male adaptor.
Once the spigot is connected to the straight thread on the nipple, the tapered thread of the nipple is lined up with the 7/8 inch hole at the bottom-side of the barrel. The spigot is used like a handle on a screwdriver to turn clockwise to insert the tapered thread of the nipple into the bottom-side hole until the nipple is snug with the side of the barrel.
INSTALLATION
- Ensure the ground beneath the rain barrel is firm and level. You may want to consider using a patio stone as a base. Cinder blocks with a patio stone on top of them will provide height so that you can put your watering can beneath the spigot or get more gravity to run the water through your hose.
- Cut the downspout 4 to 6 inches above the top of the barrel. To cut the downspout we recommend using a hacksaw. The downspout can be cut without even removing it from the wall. Tin snips can be used to finish the cut if the downspout is secured too tightly to the wall.
- Install a short flexible pipe or a downspout elbow onto the cut downspout to direct water into the top of the barrel
- Keep the remaining portion of the downspout so it can be reconnected when the rain barrel is winterized.
- Run the overflow hose either back into the drain or into a nearby garden. Additional lengths of 1.5 inch sump pump overflow hose can be purchased online through any of our sales or at most hardware stores.
OPERATING INSTRUCTIONS
Simply place the rain barrel filter basket under a downspout and connect a garden hose to the bottom ball-valve spigot. Some people prefer to elevate their rain barrel by placing them on cement blocks to increase pressure resulting from gravity.
One end of the T-shaped overflow adaptor is closed and can be opened to allow a second rain barrel to be connected in series.
RAIN BARREL MAINTENANCE
Maintenance includes clearing debris from the filter basket on occasion. Before winter, empty and rinse the rain barrel with a garden hose. Remove the spigot or leave it in the open position. Disconnect all hoses and consider placing them and the spigot inside the barrel. Do not permit water to enter the barrel during winter. Water expands when it freezes and even a small amount can cause a rain barrel to crack. Strong winter winds can send an empty rain barrel rolling away. Consider storing the barrel in a basement, garage or under a deck. To ensure water does not enter the rain barrel, consider turning it upside down or lay it on its side.
CONNECTING RAIN BARRELS IN A SERIES
Each rain barrel includes an overflow and interconnectivity adaptor. One end of the adaptor is open to allow overflow water to escape from the rain barrel through the overflow hose.
The other end is closed and can be opened with a hacksaw, punch or chisel. The overflow hose from one rain barrel can be cut to size and connected directly to the newly opened end of the overflow adaptor on the second rain barrel.
The overflow adaptor can be turned to direct water into the second barrel to ensure it fills completely before water runs out of the second overflow hose.
WINTERIZATION
Rain Barrels
Regular maintenance includes clearing debris from the filter basket on occasion. Before winter, empty and rinse the rain barrel with a garden hose. Remove the spigot and consider using olive oil to lubricate the ball valve. Disconnect all hoses and consider placing them and the spigot inside the barrel for safe storage. Do not permit water to enter the barrel during winter. Water expands when it freezes and even a small amount can cause a rain barrel to crack. Strong winter winds can send an empty rain barrel rolling away. Consider storing the barrel in a basement, garage or under a deck. If storing the barrel outside, to ensure water does not enter the rain barrel, consider turning it upside down or laying it on its side.
Rain Tanks
Rain Tanks are supported by a rigid metal cage, however this does not guarantee expanding ice will not cause damage to the plastic bottle and the ball valve. Tanks should be emptied and rinsed to remove debris. Olive oil can be used to lubricate the ball valve. Hoses should be disconnected and the tank should remain empty for the winter. Damage from exposure to the sun can be eliminated by covering the tank with a tarp. Because sunlight penetrates opaque tanks, they should be protected from the sun all year long.
Downspout Diverter
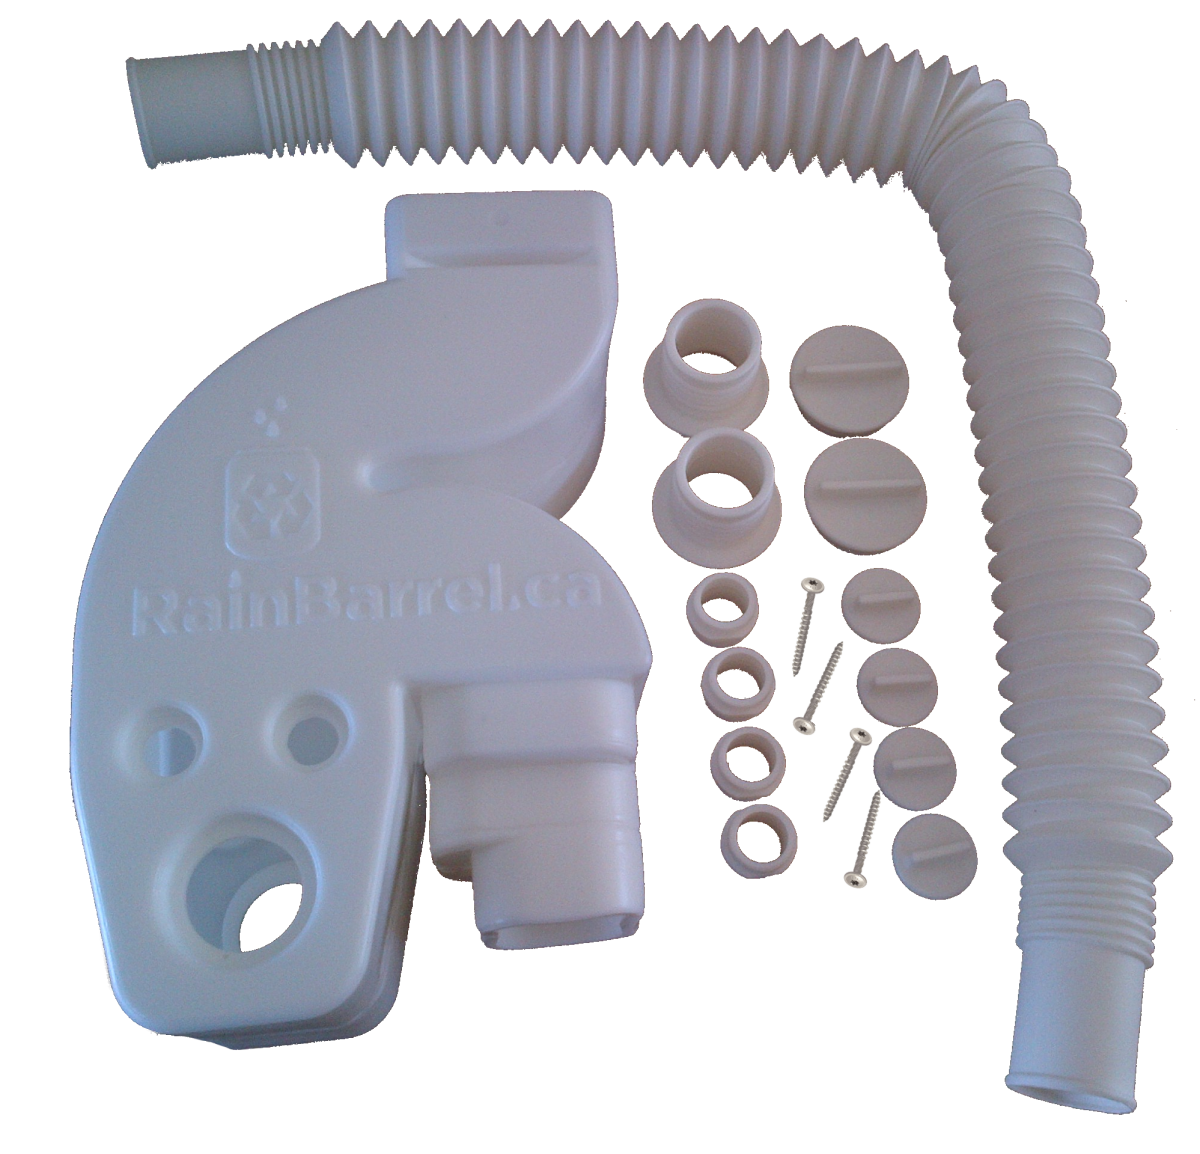
Before winter, remove all hoses and threaded outlets. A garden hose can be used to rinse the interior and the thread on the winter caps can be lubricated with olive oil before installing the caps to seal up the side openings. If your diverter is installed in a very sunny location, you may want to consider painting, covering it or removing it for the winter. Repeated freezing and thawing may stress the plastic and reduce the lifespan of the product. Proper maintenance of our products should provide years of continued service.
Rolling Composter
The rolling composter’s wooden feet are made of untreated wood. Painting them or applying a water sealant will extend their lifespan. The casters should be lubricated with olive oil to keep them from seizing. The composter can be washed out, but the composting process can continue throughout winter, although it slows due to the cold temperatures. Moving the composter to a sunny area will help increase the composting process.
Wooden Rain Barrel Stand
Wooden stands are made of untreated wood. Painting the wood or applying a water sealant will extend the lifespan of this product.
COMPOSTERS
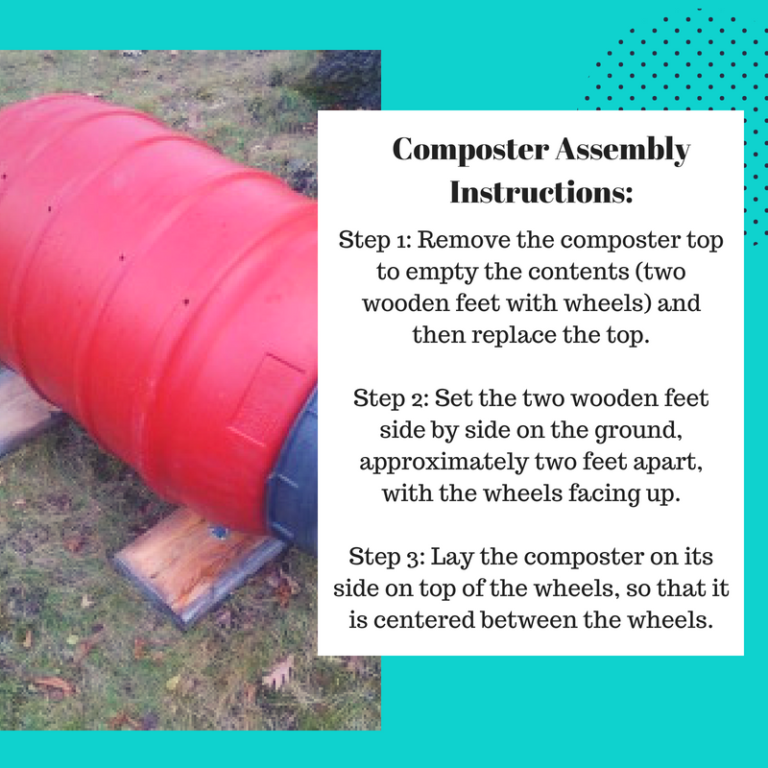
Composter Assembly Instructions:
- Step 1: Remove the composter top to empty the contents (two wooden feet with wheels) and then replace the top.
- Step 2: Set the two wooden feet side by side on the ground, approximately two feet apart, with the wheels facing up.
- Step 3: Lay the composter on its side on top of the wheels, so that it is centered between the wheels.
Composter Operation:
Place the composter where it will have good exposure to the sun.
Adding material to the composter:
Depending on the volume of material inside the composter, it may be possible to add material while the composter is laying on the wheels. Remove the lid, add chopped up food waste or lawn cuttings and then replace the lid. If the composter is nearing capacity, stand it up on the bottom with the lid facing up, remove the lid, add materials, replace the lid and set the composter back on the wheels. Save a few bags of leaves to add handfuls to the composter throughout the year.
Mixing the contents:
Heat, moisture and oxygen are important components in the composting process. A series of holes have been drilled into the sides of the rolling composter to allow air inside and water to escape. From time to time, spin the composter on the wheels to mix the contents and to accelerate the composting process. If the contents are very dry, it can be helpful to add water. Stationary composters will require a shovel or pitch fork to mix the materials.

Emptying the composter:
Compost should appear dark and crumble when disturbed. Remove the lid and use a trowel or shovel to reach into the interior of the composter to remove the contents. Take care not to damage the plastic. When the composter is light enough; it can be turned upside down to empty the remaining contents. The material can be screened to remove large and incomplete decomposing materials which can be added back into the composter.
Winter operation:
The composting process slows down greatly in cold weather, however with sufficient heat from the sun and protection from winter winds, it is possible to continue to advance the process so that compost is available at the beginning of the growing season.
Composter Maintenance:
Wood will begin to decay over time, especially when in contact with damp earth. Consider placing the composter feet on patio stones, bricks, or other pieces of wood. This will help elevate the composter feet and keep them a distance from the moist ground. Consider applying a wood sealant to the wooden feet at the beginning of each season. Apply vegetable oil to the wheels at the beginning and end of each season and whenever they appear to need lubrication to keep them free rolling. Proper maintenance will keep your rolling composter operating properly for many years.
Composter Warranty:
A two year product repair or replacement warranty is offered under normal use. Proof of purchase is required.

MAINTENANCE OF ACCESSORIES
Rain Barrel Stand Instructions:
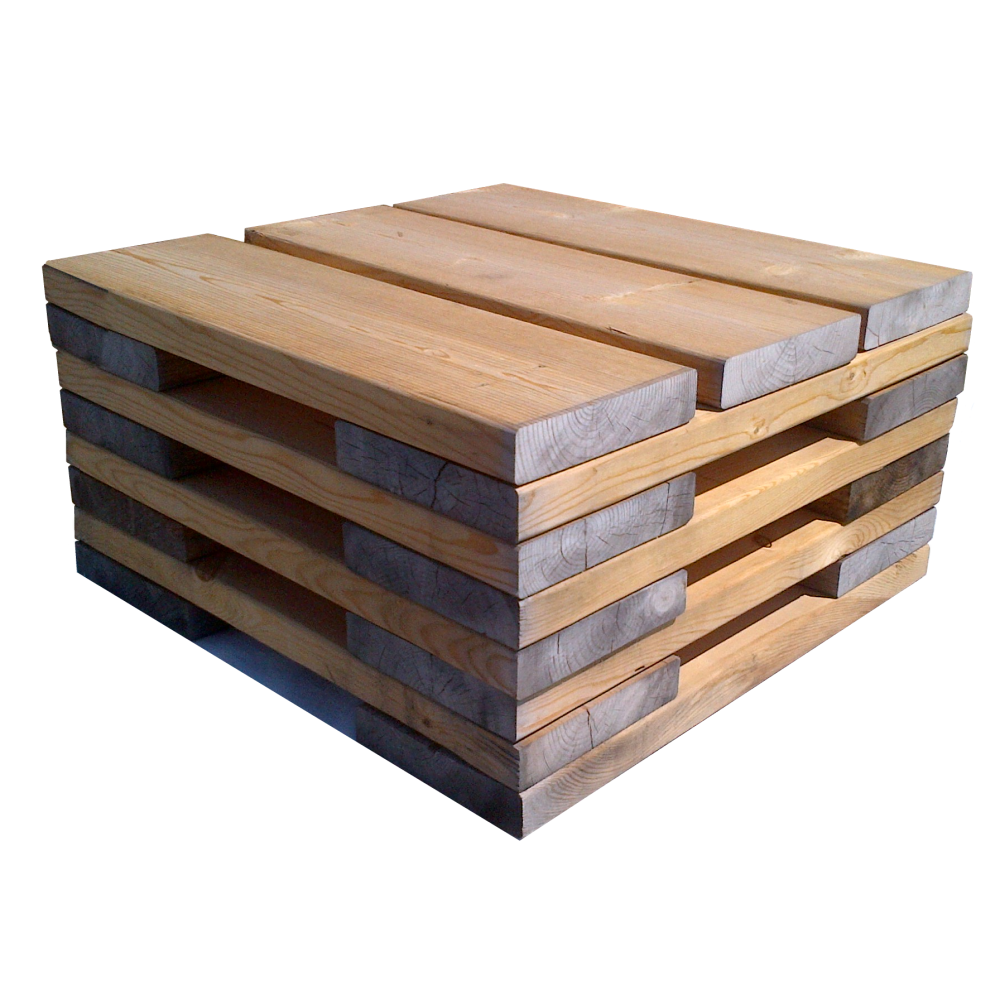
The boards can be stacked in alternating directions, 8 levels high to create a stand that is 1 foot tall. We recommend using a solid base of gravel, bricks or a 2×2 patio stone. The exact same boards can be secured together with 3.5 inch wood screws to create a 2 foot tall, bench-style stand, however the wood screws must be purchased separately from your local hardware store. Before constructing your rain barrel stand, consider allowing the wood to thoroughly dry and treating it with a sealer, stain or paint to extend the lifespan of the wood. Organize the pieces in advance so that the best sides are facing outward and so that the very best pieces are used to construct the top surface.

Universal Downspout Diverter Instructions:
Remove and empty all hoses. Remove diverter fittings, clean out debris or dirt from inside diverter. Clean diverter thread and apply vegetable oil to thread before inserting winter cap. Vegetable oil will reduce friction and allow caps (winter) or fittings (spring) to thread in much more easily. Place all hoses and fittings inside original plastic Ziploc bag for safe storage.

WARRANTY
A two year return-to-depot repair or replacement warranty is offered on all parts and workmanship under normal use from the date of purchase. Proof of purchase is required.
After the warranty period, replacement parts will be available through our website or at most local hardware stores.

